
Hi all,
After collecting issues when using the original version of iSBatch, I am restarting the development aiming to improve user’s experience.
More information to come!
Cheers Victor
Hi all,
After collecting issues when using the original version of iSBatch, I am restarting the development aiming to improve user’s experience.
More information to come!
Cheers Victor
Before running a macro the user has to select a node on which the macro will run. The macro will be executed for each file node that lies below the selected node and conforms to the given selection criteria. In this tutorial we run the macro on the DnaX project.

After clicking the Run Macro operation it is necessary to select on which channel the macro needs to be executed.

Optionally it is also possible to specify keywords that need to be in the filename. Only file nodes with a filename that contains all the keywords will be considered. When the macro changes the original file and you want the original file to be overwritten by the output of the macro you need to check the ‘replace original file’ checkbox.

In this first example we delete the first slice of each image stack that is of the green channel and belongs to the DnaX project (the node that we selected before). We specify the filename of the output file to be ‘[Green]tutorial1’. Instead of typing the macro every time you can also open a pre-existing macro file by clicking the ‘choose Macro file’ button.

After clicking the ‘run’ button the macro is executed for each file node of the green channel. The output of the macro is stored as ‘[Green]tutorial1’ in the database tree. The newly created file node will be alongside the file node on which the macro operated (they will have the same parent node). Note that the created files will be shown as ‘[Green][Green]tutorial1’ in the the database. This is because each filenode is shown with the corresponding channel as a prefix ‘[Green]’ . The filename is ‘[Green]tutorial1.tif’ so the node is shown as ‘[Green][Green]tutorial1.tif’.

It is also possible that the macro outputs a results table instead of an image. The following example does just that.
We selected the DnaX project again and clicked on the ‘run macro’ operation. We run the macro on the green channel and we do not pose any constrains on the filename. After running the macro the tree contains a results table ‘[green]tutorial2.csv’ for each file node on which the macro executed.

The Peak Finder plugin detects all peaks withing certain conditions and return ROIS for each detected peak. iSBatch detects peaks for all images in a certain node saving the results in one zip file at FieldOfView/PeakFinder/peaks.zip.

Fill the empty spaces with the following information:
* Name: iSBatch
* URL: http://sites.imagej.net/Vcaldas
* Host: webdav:Vcaldas
```
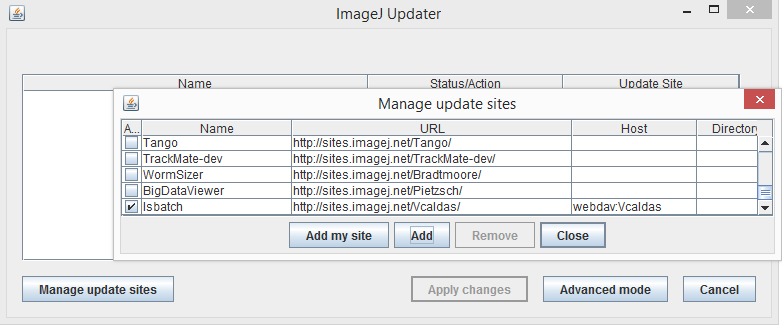
Close the panel to continue;
3 - Back to the ImageJ Updater panel, select on **View options** : *View files of iSBatch site*
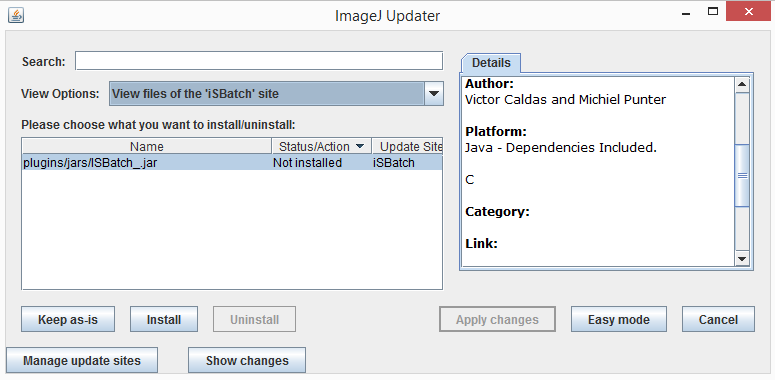
4 - Click **install** and then **Apply changes** to download iSBatch;
5 - Restart Fiji;
iSBAtch is stored in the folder Fiji/plugins/jar. ```
If you find any issue, please report on our Issues Page